Use this information to remove a ServeRAID SAS/SATA controller.
Before you remove the SAS/SATA adapter from the system board,
complete the following steps:
- Read Safety and Installation guidelines.
- If the compute node is installed in a NeXtScale n1200 Enclosure, remove it (see Removing a compute node from a chassis for instructions).
- Carefully lay the compute node on a flat, static-protective surface, orienting the compute node with the bezel pointing toward you.
You can replace the ServeRAID controller with another supported ServeRAID controller. For a list of supported ServeRAID controllers, see the Lenovo ServerProven website.
Note: For brevity, in this documentation the ServeRAID SAS/SATA controller
is often referred to as the SAS/SATA adapter or the ServeRAID
adapter.
To remove the SAS/SATA adapter from the system board, complete the following steps:
-
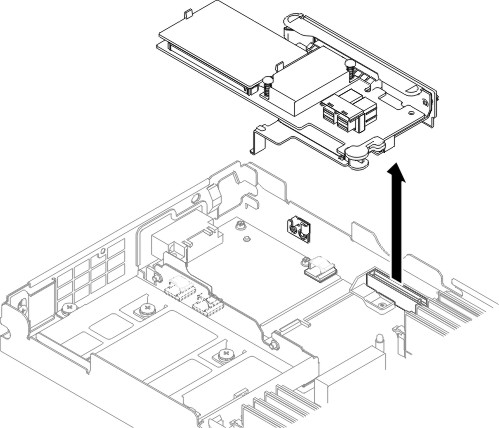
Grasp the touch points on both sides of the riser cage.
Then, lift up the riser cage out of the compute node.
Figure 1. ServeRAID adapter removal
-
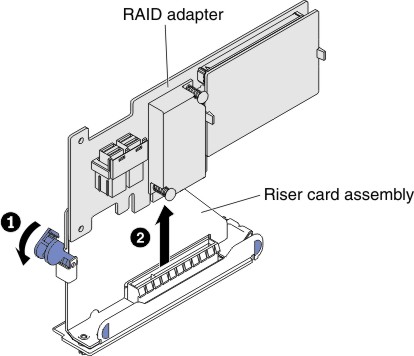
Open the retention bracket and remove the SAS/SATA adapter
from the riser cage.
Figure 2. RAID adapter removal
If you are instructed to return the SAS/SATA adapter, follow all packaging instructions, and use any packaging materials for shipping that are supplied to you.