Use this information to install the hard disk drive backplate.
Before you install the hard disk drive backplate, complete
the following steps:
- Read Safety and Installation guidelines.
- If the compute node is installed in an IBM NeXtScale n1200 Enclosure, remove it (see Removing a compute node from a chassis for instructions).
- Carefully lay the compute node on a flat, static-protective surface, orienting the compute node with the bezel pointing toward you.
To install the hard disk drive backplate, complete the following steps.
Figure 1. Installing backplate
for 2.5-inch
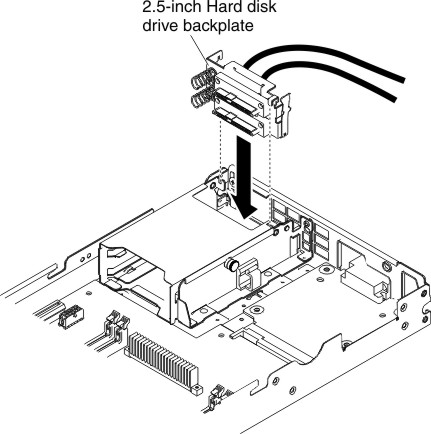
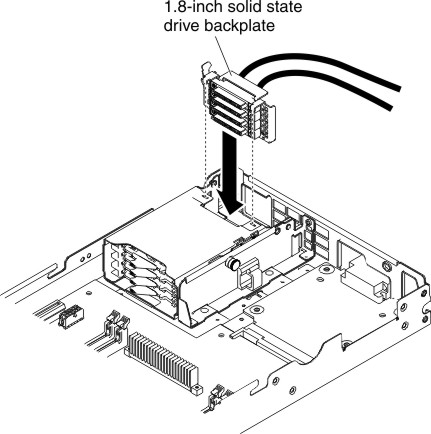
Figure 2. Installing backplate for 1.8-inch
- Remove the cover (see Removing the compute node cover).
- Align the backplate with the hard disk drive cage and the connector on the system board and press the backplate into position until it is fully seated in the connector.
- Close the release latch.
- Slide the hard disk drive into the bay until it is firmly seated in the connector.
- Lock the hard disk drive into place by closing the release lever.
After you install the hard disk drive backplate, complete
the following steps:
- Install the cover onto the compute node (see Installing the compute node cover for instructions).
- Install the compute node into the chassis (see Installing a compute node in a chassis for instructions).