Use this information to install the front handle.
Before you install the front handle, complete the following
steps:
- Read Safety and Installation guidelines.
- If the compute node is installed in an IBM NeXtScale n1200 Enclosure, remove it (see Removing a compute node from a chassis for instructions).
- Carefully lay the compute node on a flat, static-protective surface with the cover side down, orienting the compute node with the bezel pointing toward you.
To install the front handle, complete the following
steps.
Figure 1. Installation of the front handle
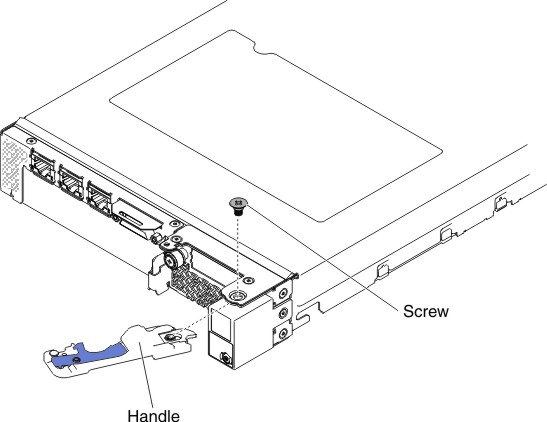
- Orient the front handle so that the blue release latch is toward the middle of the compute node.
- Align the hole in the handle with the hole on the compute node where the handle is installed.
- Using a Phillips screwdriver, install the Phillips #2 screw that secures the handle. Install the screw that you removed when you removed the handle.
After you install the front handle, install the compute node
into the chassis (see Installing a compute node in a chassis for instructions).