Replacing the Bezel

Use this information to install the bezel.

Before you install the bezel, complete the following steps:
  1. Read Safety and Installation guidelines.
  2. If the compute node is installed in a NeXtScale n1200 Enclosure, remove it (see Removing a compute node from a chassis for instructions).
  3. Carefully lay the compute node on a flat, static-protective surface, orienting the compute node with the bezel pointing toward you.

To install the bezel, complete the following steps:
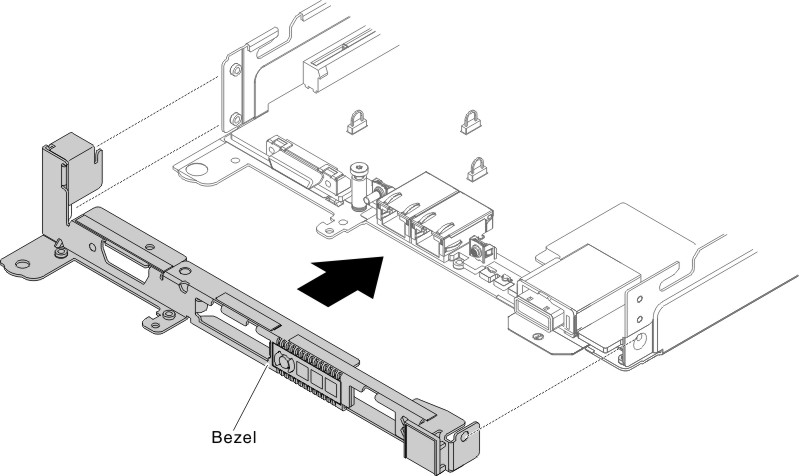
  1. Remove the cover (see Removing the compute node cover).
  2. Grasp the bezel and install the bezel into the compute node.
    Figure 1. Front bezel installation
    Front bezel installation
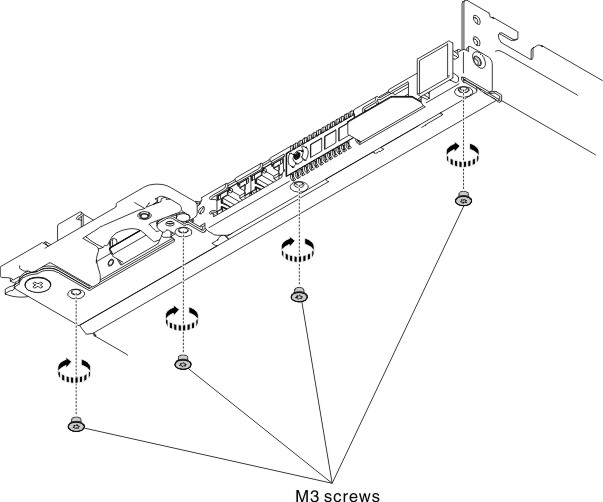
  3. Install the four M3 screws by T8 torx screwdriver (provided on the back of the chassis).
    Figure 2. M3 screws installation
    M3 screws installation
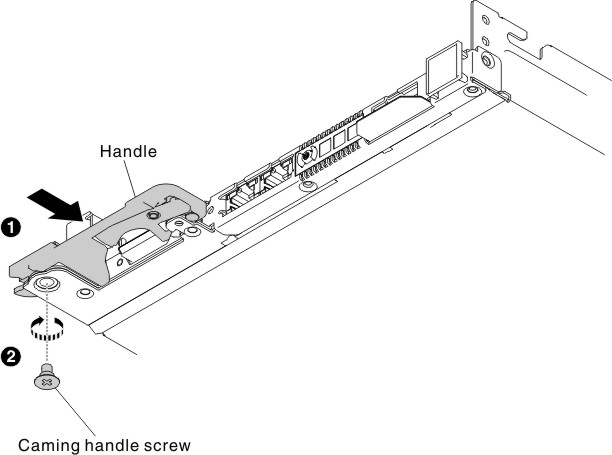
  4. Install the caming handle screw by Phillips screwdirver #2.
    Figure 3. Caming handle screw installation
    Caming handle screw installation
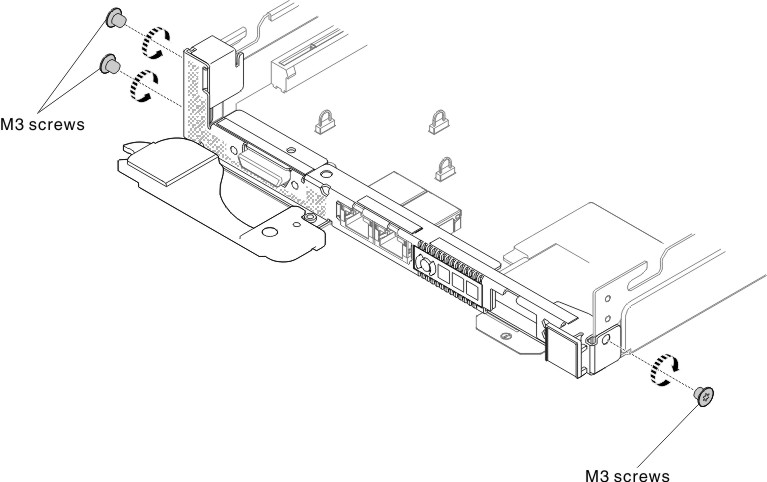
  5. Install the three M3 screws by T8 torx screwdriver (provided on the back of the chassis).
    Figure 4. M3 screws installation
    M3 screws installation
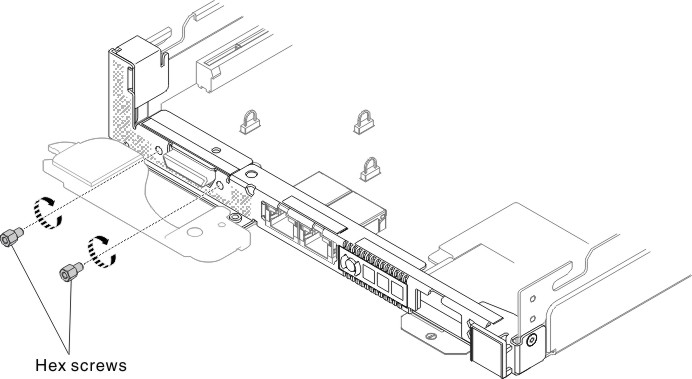
  6. Install the two hex screws by hex screwdriver.
    Figure 5. Hex screws installation
    Hex screws installation
  7. Reinstall the cover (see Installing the compute node cover).
  8. Slide the compute node into the rack.
  9. Reconnect the power cords and any cables that you removed.
  10. Turn on the peripheral devices and the compute node.