Use this information to install a GPU tray in a NeXtScale nx360 M5 compute node.
Important: When you install the new GPU tray, you must update the GPU tray with the latest firmware. Make sure that you have the latest firmware
before you proceed. See Updating the firmware for more information.
Note: The GPU tray supports only 1300-watt power supply unit with high-line Vin (AC
200 volt to 240 volt).
Before you install the compute node in
a chassis, read Safety and Installation guidelines.To install the GPU tray to compute node, complete the following steps:
-
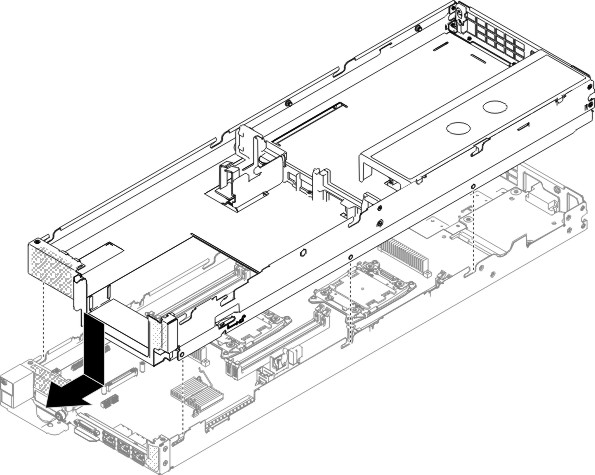
Orient the GPU tray so
that the posts on the inside of the GPU tray slide
into the slots on the compute node.
Note: Before you install the GPU tray, make sure that the air baffles and all components are installed and seated correctly and that you have not left loose tools or parts inside the compute node.Figure 1. GPU tray installation