Use this information to remove a 1.8-inch hard disk drive.
Attention: Static electricity that is released
to internal server components when the server is powered-on might
cause the server to halt, which might result in the loss of data.
To avoid this potential problem, always use an electrostatic-discharge
wrist strap or other grounding system when you work inside the server
with the power on.
To remove a 1.8-inch hard disk drive, complete the following steps.
-
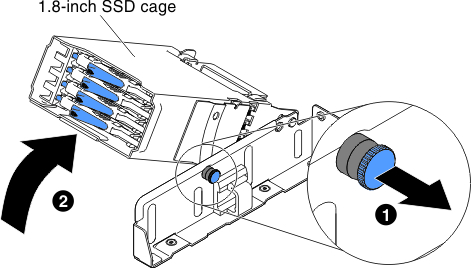
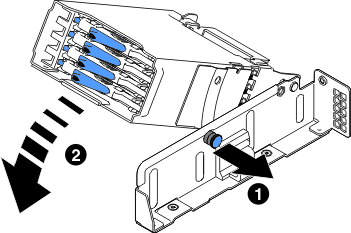
Pull the plunger of the 1.8-inch hard disk drive cage outward
and rotate the cage upward.
Figure 1. Lift the 1.8-inch hard disk drive cage upward
-
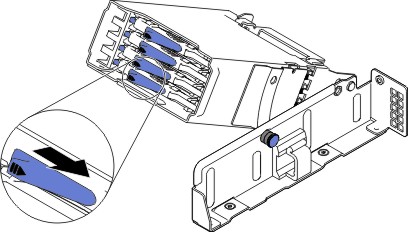
Push the release latch outward to release the drive handle.
Figure 2. 1.8-inch hard disk drive removal
-
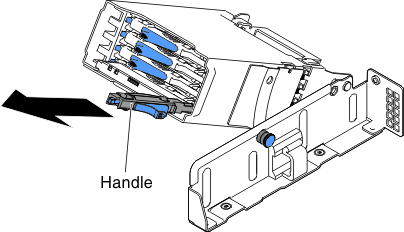
Unlatch the drive handle.
Figure 3. 1.8-inch hard disk drive removal
-
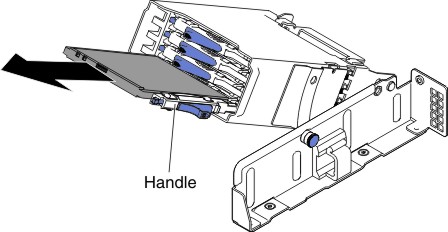
Then, pull the drive out of the drive bay.
Figure 4. 1.8-inch hard disk drive removal
-
Pull the plunger of the 1.8-inch hard disk drive cage outward
and rotate the cage downward until the cage snaps into place.
Figure 5. Put the 1.8-inch hard disk drive cage downward
If you are instructed to return the component or optional device, follow all packaging instructions, and use any packaging materials for shipping that are supplied to you.