Use this information to remove the optional drive cage.
Read the safety information in Safety and Installation guidelines.
Note: You
only need to remove the drive cage if a system board is replaced.
To remove the optional drive cage, complete the following steps:
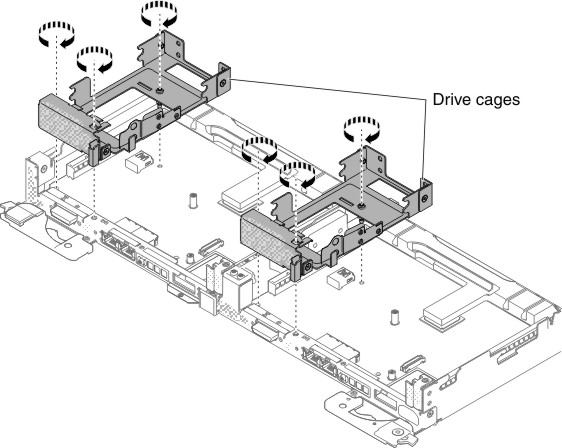
- Remove the three screws that secure the drive cage to the water-cooled technology tray and
save them for future use.
Figure 1. Drive cage screws removal
If you are instructed to return the server component or optional device, follow all packaging instructions, and use any packaging materials for shipping that are supplied to you.