Use this information to replace a SD adapter.
Important: If your SD adapter option comes with
VMware vSphere ESXi software preloaded, you must make configuration
changes to your system UEFI before installing the SD adapter
in your compute node. See the documentation that comes with the SD
adapter and Using the Setup utility for information and instructions.
Before you install the SD adapter, complete the following steps:- Read Safety and Installation guidelines.
- If the compute node is installed in a NeXtScale n1200 Enclosure, remove it (see Removing a compute node from a chassis for instructions).
- Carefully lay the compute node on a flat, static-protective surface, orienting the compute node with the bezel pointing toward you.
To install the SD adapter, complete the following steps:
-
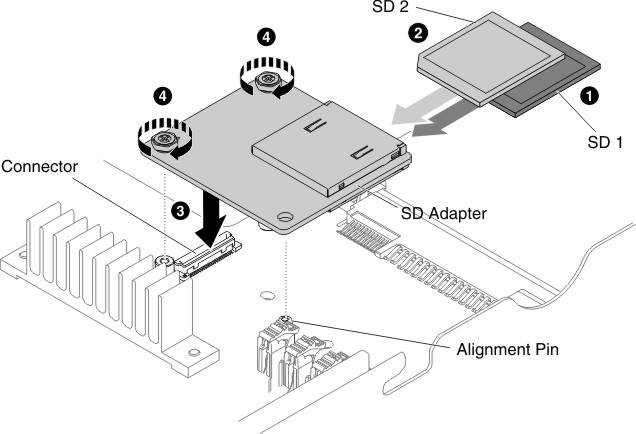
Fasten the two screws.
Figure 1. SD adapter installation