Use this information to remove the hard disk drive backplate.
Before you remove the hard disk drive backplate, complete
the following steps:
- Read Safety and Installation guidelines.
- If the compute node is installed in a NeXtScale n1200 Enclosure, remove it (see Removing a compute node from a chassis for instructions).
- Carefully lay the compute node on a flat, static-protective surface, orienting the compute node with the bezel pointing toward you.
To remove the hard disk drive backplate, complete the following steps.
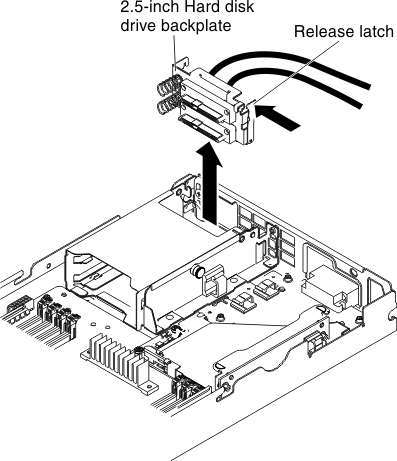
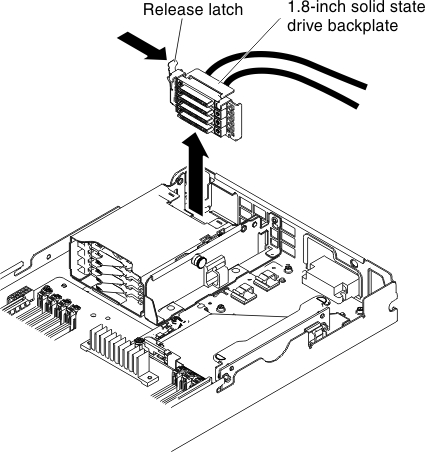
Figure 1. Removal of HDD backplate for 2.5-inch and 1.8-inch respectively
- Remove the cover (see Removing the compute node cover).
- Remove the hard disk drives (see Removing and installing drives).
- Unlatch and slide out slightly the easy-swap hard disk drive (just enough to disengage the drive or filler).
- Disconnect the cable from the planar or RAID adapter.
- Unlatch the release latch and lift out the hard disk drive backplate.
If you are instructed to return the hard disk drive backplate,
follow all packaging instructions, and use any packaging materials
for shipping that are supplied to you.