Replacing the optional drive cage

Use this information to install the optional drive cage.

Read the safety information in Safety and Installation guidelines.

Note: You only need to install a drive cage if it was previously removed for system board Service.

To install the optional drive cages, complete the following steps:

  1. Turn off the water-cooled technology tray and peripheral devices and disconnect the power cords and all external cables.
  2. Remove the cover (see Removing the cover).
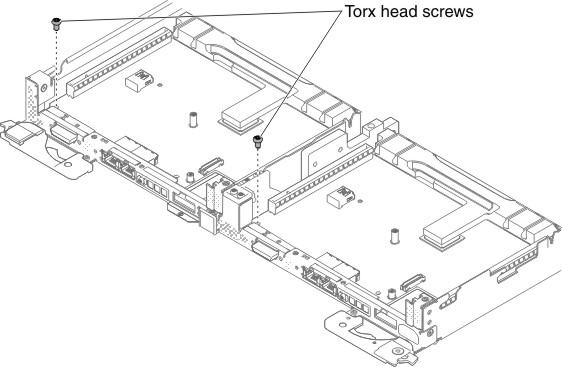
  3. If this is the first time that you install the drive cage, remove the one torx head screw from the water-cooled technology tray.
    Figure 1. Torx head screws removal
    Torx head screws removal
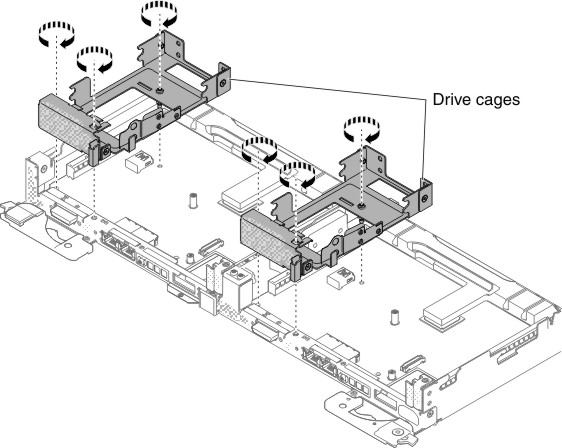
  4. Place the drive cages on the water-cooled technology tray.
    Figure 2. Drive cage installation
    Drive cage installation
  5. Install the three screws that secure the Solid State drive cage to the water-cooled technology tray.
  6. Reinstall the hard disk drives/solid state drives and route the cables as instructed (see Replacing a hard disk drive (HDD)/solid state drive (SSD)).
  7. Reinstall the cover (see Replacing the cover).
  8. Slide the compute node into the rack.
  9. Reconnect the power cords and any cables that you removed.
  10. Turn on the peripheral devices and the compute node.