Use this information to install a hard disk drive (HDD)/solid state drive (SSD).
Read the safety information in Safety and Installation guidelines.
If you are replacing a server component in the water-cooled technology tray, you need to remove the water-cooled technology tray from the chassis enclosure and refer to the Removing a water-cooled technology tray from a chassis and Installing a water-cooled technology tray in a chassis sections.
To install a hard disk drive (HDD)/solid state drive (SSD), complete the following steps:
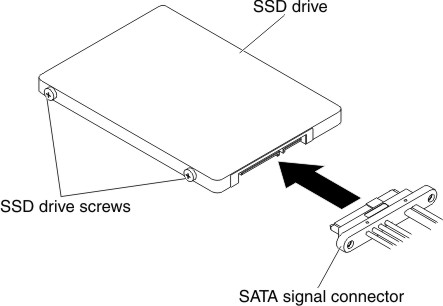
- Plug in the SATA signal connector into the HDD/SSD drive.
Figure 1. SATA signal connector installation
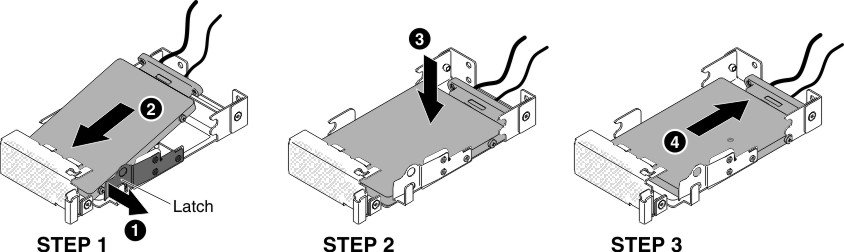
- Push the HDD/SSD outward.
Figure 2. HDD/SSD installation
- Install the two screws between the HDD/SSD and the drive
cage. Make sure the screws are seated in the middle of the holes so
they are firmly installed. Spring will snap into place around the
front screw when drive is seated in place.
Figure 3. Side view of a HDD/SSD
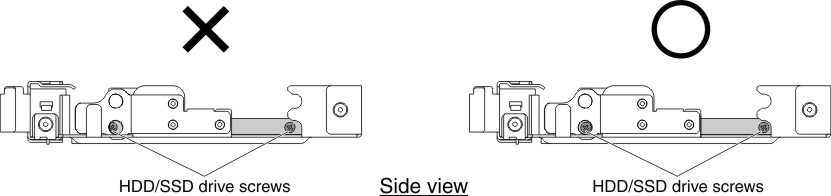
Figure 4. Front view with HDDs/SSDs installed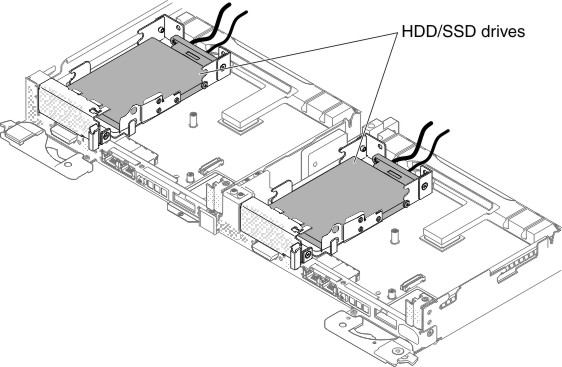
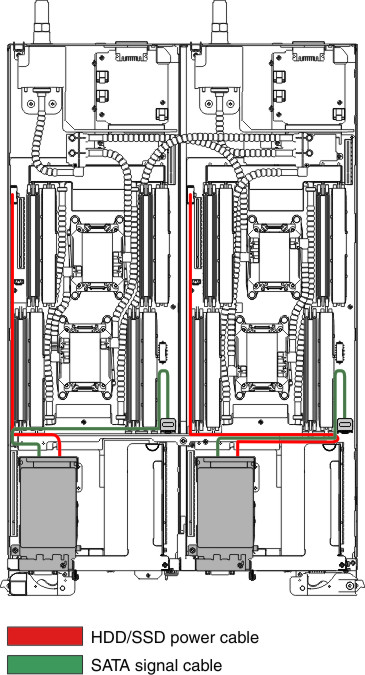
- Route the cables as the illustration displayed.
Figure 5. Cable routings for the HDDs/SSDs power cables and the SATA signal cables