Use this information to replace the optional PCI or ML2 adapter.
Read the safety information in Safety and Installation guidelines.
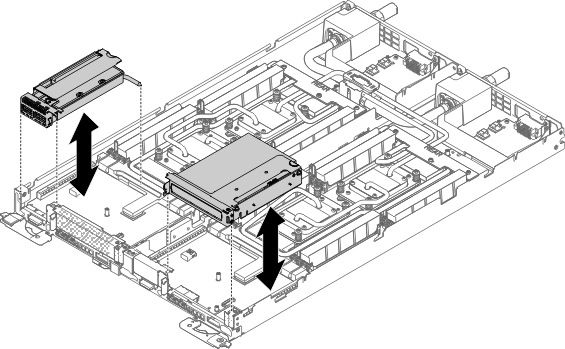
If you are replacing a server component in the water-cooled technology tray, you need to remove the water-cooled technology tray from the chassis enclosure and refer to the Removing a water-cooled technology tray from a chassis and Installing a water-cooled technology tray in a chassis sections.
To replace the optional PCI or ML2 adapter, complete the following steps.
註:
- If your adapter was previously configured, backup or record its configuration information, if possible, before replacing the adapter. See the documentation for your adapter for information and instructions.
- In the legacy mode, this system has limited ROM space for installed options. At most four network interface cards (NICs) are supported for legacy PXE boot. If more than four NICs are installed, legacy PXE boot will not be attempted on some of the NICs. To enable legacy PXE boot on the desired NIC connectors, prioritize the desired NIC connectors by changing the ROM execution Order or disable the NIC connectors that you do not use from the Enable/Disable Adapter Option ROM Support menu.
- Insert the adapter/ML2 card into the PCI riser-cage assembly/ML2
riser card assembly, aligning the edge connector on the adapter/ML2
card with the connector on the PCI riser-cage assembly/ML2 riser card
assembly. Press the edge of the connector firmly into the PCI
riser-cage assembly/ML2 riser card assembly. Make sure that the adapter/ML2
card snaps into the PCI riser-cage assembly/ML2 riser card assembly
securely.
圖 1. Adapter installation
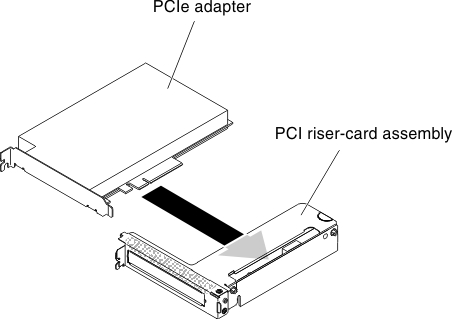
圖 2. ML2 card installation
- Align the PCI riser-cage assembly/ML2 riser card assembly
with the slots and press the PCI riser-cage assembly/ML2 riser card
assembly firmly into the tray.
圖 3. PCI riser-cage assembly/ML2 riser card assembly installation