Use this information to install the rear hard disk drive cage.
Before you install the rear hard disk drive cage, complete
the following steps:
- Read Safety and Installation guidelines.
- If the compute node is installed in a NeXtScale n1200 Enclosure, remove it (see Removing a compute node from a chassis for instructions).
- Carefully lay the compute node on a flat, static-protective surface, orienting the compute node with the bezel pointing toward you.
To install the rear hard disk drive cage, complete the following steps.
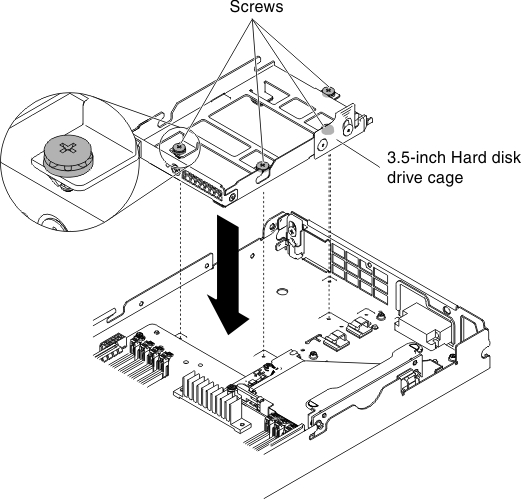
Figure 1. Installing a hard disk drive cage (3.5-inch)


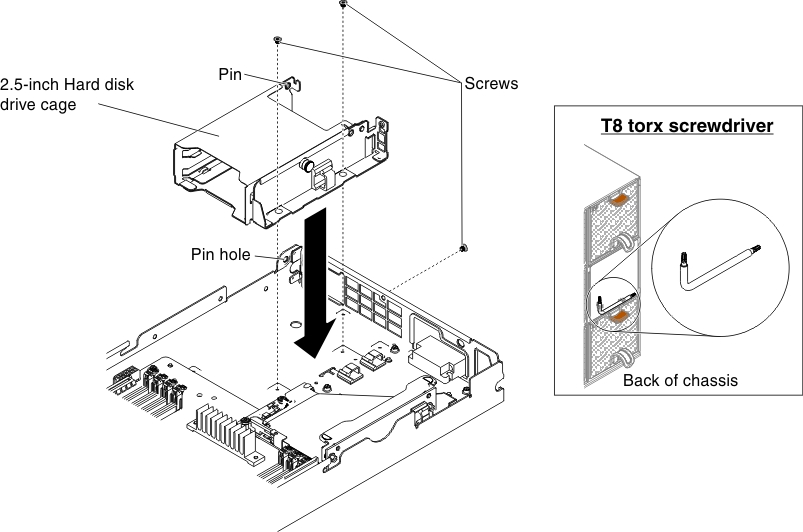
Figure 2. Installing a hard disk drive cage (2.5-inch)


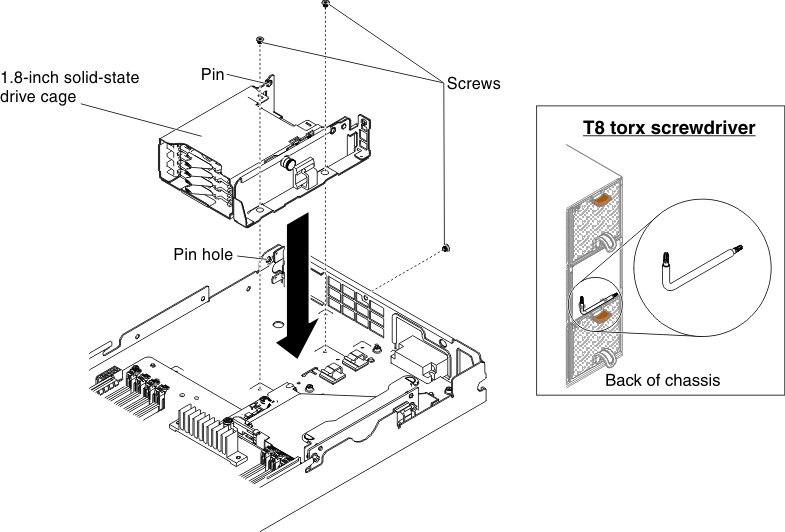
Figure 3. Installing a hard disk drive cage (1.8-inch)


- Remove the cover (see Removing the compute node cover).
- Position the cage with an angle and rotate the cage into position on the system board.
- Align the cage with the screw holes on the planar tray.
- Using a Phillips (for 3.5-inch hard disk drive cage) or T8 torx (part number 00FK488, for 2.5-inch or 1.8-inch hard disk drive cage, provided on the back of the chassis) screwdriver, insert the screws (four for 3.5-inch hard disk drive cage and three for 2.5-inch or 1.8-inch hard disk drive cage) and secure the cage in the compute node.
- Install the hard disk drive backplate if there is one (see Installing the hard disk drive backplate).
- Insert the easy-swap hard disk drives or the solid-state drives (see Removing and installing drives).
- For cable routing, see Internal cable routing and connectors.
After you install the hard disk drive cage, complete the
following steps:
- Install the cover onto the compute node (see Installing the compute node cover for instructions).
- Install the compute node into the chassis (see Installing a compute node in a chassis for instructions).