The following notes describe the types of adapters that the server supports and other information that you must consider when you install an adapter.
Before you install an adapter/GPU adapter, complete the following
steps:
- Read Safety and Installation guidelines.
- If the compute node is installed in a NeXtScale n1200 Enclosure, remove it (see Removing a compute node from a chassis for instructions).
- Carefully lay the compute node on a flat, static-protective surface, orienting the compute node with the bezel pointing toward you.
- Locate the documentation that comes with the adapter and follow those instructions in addition to the instructions in this section.
- For configuration information, see the ServeRAID documentation at the Lenovo Support Portal.
- When you install any PCI adapter, the power cords must be disconnected from the power source before you remove the PCI Express riser-cage assembly. Otherwise, the active power management event signal will be disabled by the system-board logic, and the Wake on LAN feature might not work. However, after the server is powered-on locally, the active power manager active power management event signal will be enabled by the system-board logic.
To install an adapter/GPU adapter, complete the following steps:
Note: If your adapter was previously configured,
backup or record its configuration information, if possible, before
replacing the adapter. See the documentation for your adapter for
information and instructions.
-
Insert the adapter/GPU adapter into the PCI riser-cage
assembly, aligning the edge connector on the adapter/GPU adapter with
the connector on the PCI riser-cage assembly. Press the edge of the
connector firmly into the PCI riser-cage assembly. Make sure
that the adapter/GPU adapter snaps into the PCI riser-cage assembly
securely.
Figure 1. Adapter installation
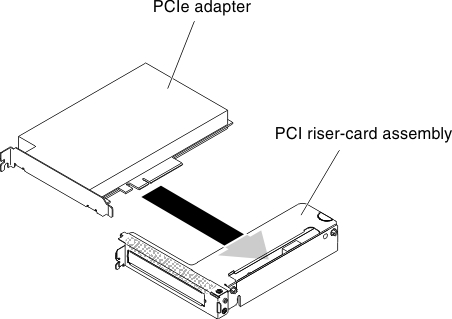
Figure 2. GPU adapter installation (to front PCI riser assembly)
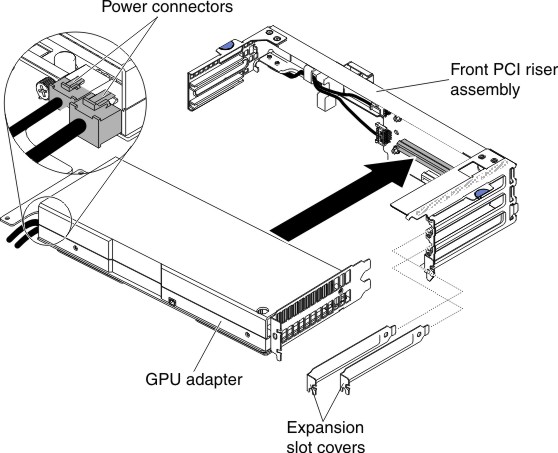
Figure 3. GPU adapter installation (to rear PCI riser assembly)
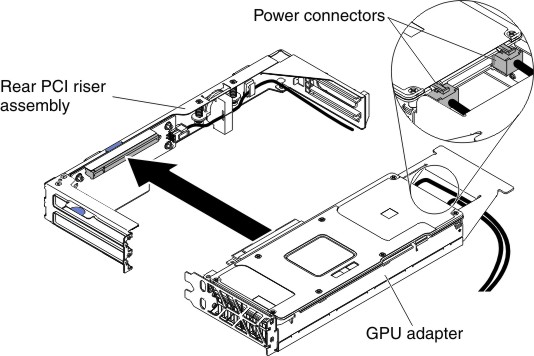
Figure 4. GPU adapter installation (to front PCI riser assembly of 2U GPU tray)
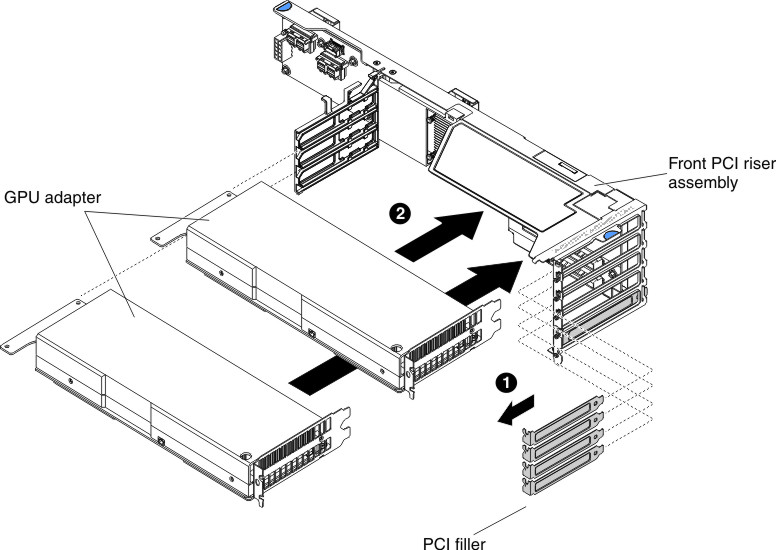
Note: Remove the PCI fillers and fillers before installing the GPU adapter(s) to the front PCI riser assembly.Figure 5. GPU adapter installation (to rear PCI riser assembly of 2U GPU tray)
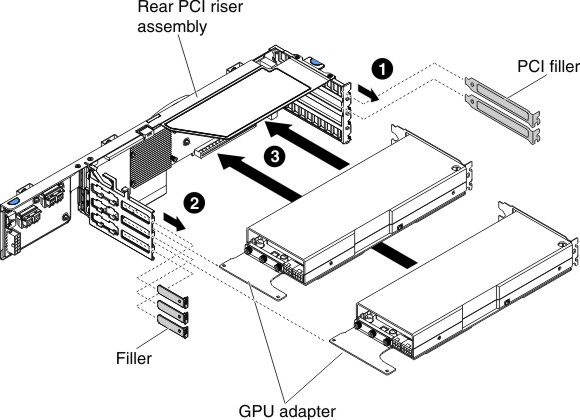
Note: Remove the PCI fillers and fillers before installing the GPU adapter(s) to the rear PCI riser assembly.Attention: When you install an adapter/GPU adapter, make sure that the adapter/GPU adapter is correctly seated in the riser-cage assembly and that the riser-cage assembly is securely seated in the riser-cage connector on the system board before you turn on the server. An incorrectly seated adapter might cause damage to the system board, the riser-cage assembly, or the adapter/GPU adapter.